After this wedding, I'm pretty sure I'll never want to create any sort of signage/labels/tags ever again. Because let me tell ya, our guests are going to be the most fully-informed, non-confused, wedding guests ever. As things have gotten down to the wire we decided to nix a few of the signs on our list because, in all of our wedding brain craziness, we came to our senses and realized our guests could probably figure some stuff out on their own (like, say, where the bathrooms are or how in the world to navigate the fifteen feet between the elevators and the ceremony space).
There were some signs that were always non-negotiable for us though, and those were the ones that were meant to be functional while also adding some crucial design flare (and, let's be honest here, that would make for some incredibly cool detail shots). Labels for the dessert buffet and the candy buffet definitely fell into that category.
As is probably true with all good design, these little devils look much more beautifully simplistic than they actually were to create. We're so proud of how they turned out, though, and are immensely relived that they're finished. So relieved, in fact, that I forgot to take pictures of the dessert buffet tags before we packed them away, which means you'll just have to wait for the pro pics to come back to see how those turned out.
But... here are some pics I did take during the process of attaching the candy buffet labels to our jars. (And in true Ferris Wheel fashion, the ribbon I used for this has been discontinued and I ran out halfway through the job. So cross your fingers that our feverish internet search actually yields the right replacement ribbon!)
Now, on to the pictures!
Any chance that you'll be over-informing the guests at your wedding? And admit it - you like pretty signs too, right?
Showing posts with label design. Show all posts
Monday, October 10, 2011
Thursday, September 29, 2011
Rehearsal Plans and Rhyming Words
Apparently the theme of my posts lately is "Ms. FW brags about Mr. FW's amazingness." So to continue with that theme, I'd like to tell you about how instrumental Mr. FW was in creating our super fun rehearsal dinner invites. It started when we were both standing in line at Michael's (so we could have two separate transactions and thus use two separate 40% off coupons - obvs) and he wandered over to the $1 bargain section, where he picked up the cutest little silverware set rubber stamp. He suggested that it might be nice to emboss this little knife, fork, and spoon design onto the back of whatever rehearsal dinner invite we chose. Of course I was all for that, so we snapped up the stamp and then went looking for a coordinating invite.
We fell in love with this design from Invitation Consultants. (FYI... we were really happy with the quality of these invites. The paper has a slight sheen to it that feels very luxe, and they are printed in color on both sides. Also awesome was that we snagged a $10 off coupon from Retail Me Not!)
Now let me direct your eye to the truly amazing part. See, Mr. FW is an incredible wordsmith (seriously, he can make anything sound good) so he had no trouble coming up with the most adorable rhyme to set the tone for our rehearsal and rehearsal dinner.
You're impressed, right? Yeah, me too. He also decided to include these little personalized timelines for each person we were mailing the invitation to, so they would know exactly when and where to show up for the rehearsal part of the day.
Then we packaged them up, did a little embossing, slapped on our favorite celebration stamps, and they were ready to go. (Of course, this was after the font freak in me insisted we find an address font that was similar to the invitation title font - because I just knew we already had one and it made me feel so good to see what a near perfect match they were. All that, even though I knew rationally not a single guests would ever notice the fonts. Nope, that level of detail-consciousness was just for me!)
And that makes one more project off the to-do list, courtesy of Mr. FW. What would I do without him?
Did you do a rehearsal, complete with invitations and everything? Honestly we didn't really expect to, but I guess it's happening now whether we like it or not! :-)
We fell in love with this design from Invitation Consultants. (FYI... we were really happy with the quality of these invites. The paper has a slight sheen to it that feels very luxe, and they are printed in color on both sides. Also awesome was that we snagged a $10 off coupon from Retail Me Not!)
Now let me direct your eye to the truly amazing part. See, Mr. FW is an incredible wordsmith (seriously, he can make anything sound good) so he had no trouble coming up with the most adorable rhyme to set the tone for our rehearsal and rehearsal dinner.
before the knot's tied come help set the mood
we're ready to celebrate with drinks and Thai food
at our rehearsal dinner we'd like you to be
if for no other reason than because it is free
Smooth Thai is in the lobby of the Parc 55
casual dress will match the laid-back vibe
we'll eat at 6PM on the tenth of november
and we hope it will be a night to remember
so please come and join us on the eve of our day
and know that we love you more than we can say!
You're impressed, right? Yeah, me too. He also decided to include these little personalized timelines for each person we were mailing the invitation to, so they would know exactly when and where to show up for the rehearsal part of the day.
Then we packaged them up, did a little embossing, slapped on our favorite celebration stamps, and they were ready to go. (Of course, this was after the font freak in me insisted we find an address font that was similar to the invitation title font - because I just knew we already had one and it made me feel so good to see what a near perfect match they were. All that, even though I knew rationally not a single guests would ever notice the fonts. Nope, that level of detail-consciousness was just for me!)
And that makes one more project off the to-do list, courtesy of Mr. FW. What would I do without him?
Did you do a rehearsal, complete with invitations and everything? Honestly we didn't really expect to, but I guess it's happening now whether we like it or not! :-)
Monday, September 19, 2011
At Last, the Invitation Reveal
The RSVP's have started to trickle in, which tells me that it's finally time to reveal the Ferris Wheel invitations to the world. Are you as excited as I am? Oooh, I certainly hope so! Truth be told, every single step of creating these little lovelies - design, production, and packaging - was unimaginably time-consuming. The process involved unanticipated material costs, social isolation, lack of sleep, a ridiculous amount of mistake corrections, and at least one or two probably unnecessary freak-outs ("Oh no, I think I hate them. Do I hate them? Should I hate them? Will other people hate them? Maybe we should start over from the beginning. Agh!"). But, BUT... At the end of all that, thankfully we adore the outcome! That would be enough on its own, but we've heard from at least a few people that they love them too, and somehow that makes it all worth it.
If you've been around the hive long enough, you'll notice right away that I drew significant packaging inspiration from Mrs. Apple Cider's invitations. Like her, we addressed the vellum envelopes by running them through our inkjet printer and it worked just fine. Oh, and one more thing... I just have to give a special shout-out to those celebration stamps because Mr. FW and I are obsessed with their awesomeness. (Side note: we also like to say that our stamps read "celebrate George Washington." Silly!)
Mr. FW created this sleek logo for us that somehow manages to incorporate so many of our elements - spirograph, wedding date, ombre ink effect - into a little one inch circle.
Okay, enough with the words. On to the pictures!
{envelope back}
For no particular reason, let's start with the back. It's difficult to tell from the picture but the spirograph is embossed on there, creating that amazing glossy, raised look that only heat embossing can give you. You can also see the bow of the baker's twine that's wrapped around the pocketfold.
{envelope front and the wrapped pocketfold that goes inside}
If you've been around the hive long enough, you'll notice right away that I drew significant packaging inspiration from Mrs. Apple Cider's invitations. Like her, we addressed the vellum envelopes by running them through our inkjet printer and it worked just fine. Oh, and one more thing... I just have to give a special shout-out to those celebration stamps because Mr. FW and I are obsessed with their awesomeness. (Side note: we also like to say that our stamps read "celebrate George Washington." Silly!)
{our logo}
Mr. FW created this sleek logo for us that somehow manages to incorporate so many of our elements - spirograph, wedding date, ombre ink effect - into a little one inch circle.
{open pocketfold}
When our guests unwrap the baker's twine and open the pocketfold, this is what they'll see. To walk you through it, there's our striped "liner" (printed at home on semi-gloss paper) on both sides, the matted invitation (printed on the Gocco), four inserts (printed on our printer) with a design that lines up along the right hand side, and of course a picture of us. The part I adore most about the invitation itself, and that you can't see because I removed our names, is how only our names and the word "love" are highlighted by the blue text. Aww...
{all of the inserts taken out of the pocketfold}
When our guests take out the inserts they'll find cards for accommodations, map, more information, and RSVP (both front and back pictured above).
{accommodations insert}
Our accommodations card offers brief information about how our guests can reserve rooms at the venue and points them to our website for other hotel information. I am so in love with this little card - from the spirograph in the center to the fading ink for the text. *Swoon*
{map insert}
Mr. FW created this map insert from start to finish, and it's a great example of what an excellent team we are. This is not anything I'd know how to do, nor do I have even have the programs for it. So he did all of it and then we just dropped it into my layout. How adorable is that little blue star?!
{more information insert}
We needed to find a way to let guests know all of this additional information that we didn't want to squeeze onto the invitation, so we gave it its own card. The only thing I didn't remember to include was suggested attire, so I hope people actually do check the website and see that we're going more for cocktail attire than black tie. I guess we'll find out soon enough.
{RSVP postcard - of course the final ones actually had a stamp on them}
I really enjoyed designing the RSVP card. I wanted to make them fun while also trying to increase the chances that they would serve their primary funcions - tell us who's coming and what they'd like to eat. Skipping the M____________ blank that even I still don't totally understand, I labeled the name blank with the oh-so-helpful word "name" and put pictures of the entree choices right beside it. (But just in case, we did also use an invisible blacklight marker to number each of them.) Instead of accept/regret options, I used the words "yay" and "boo" because those are things we actually say all the time. The hotel information will help us to distribute the out of town bags, and if people list a favorite song then we'll try to include it in our playlist for the night. According to our current count, we will have at least 13 guests at our wedding. :-)
{ready to go out into the world}
In designing this suite I found out that it's not easy to make predominantly black, gray, and white elements look special or artistic, especially when you're just going to print them on a regular inkjet printer. But as we started to put all the pieces together, it really felt like we achieved exactly the look we were going for. Yay!
Would you ever make the crazy and yet absolutely worth it decision to design your own invitation suite? If you have any questions about how we constructed anything, feel free to ask!
Wednesday, August 17, 2011
Even The Easy Things Aren't So (Or, How I Over-Complicate Everything)
Last night on our way home from running some wedding errands Mr. FW noticed, "We're taking turns breathing heavy sighs." And once he said that I realized I, too, could hear the sounds of deep, controlled inhales alternating with unsatisfactory exhales. For the first time it was really starting to weigh on us just how how little time is left before our wedding day and just how much needs to get finished during that limited time. We are working on wedding projects constantly at this point, and days are flying by at breakneck speed. Yet it never seems the list gets any shorter. In fact, for every one item that we start or complete, at least one other item gets tacked on. So we both get ridiculously giddy when we find a project that seems like it will be quick and easy to cross off the list.
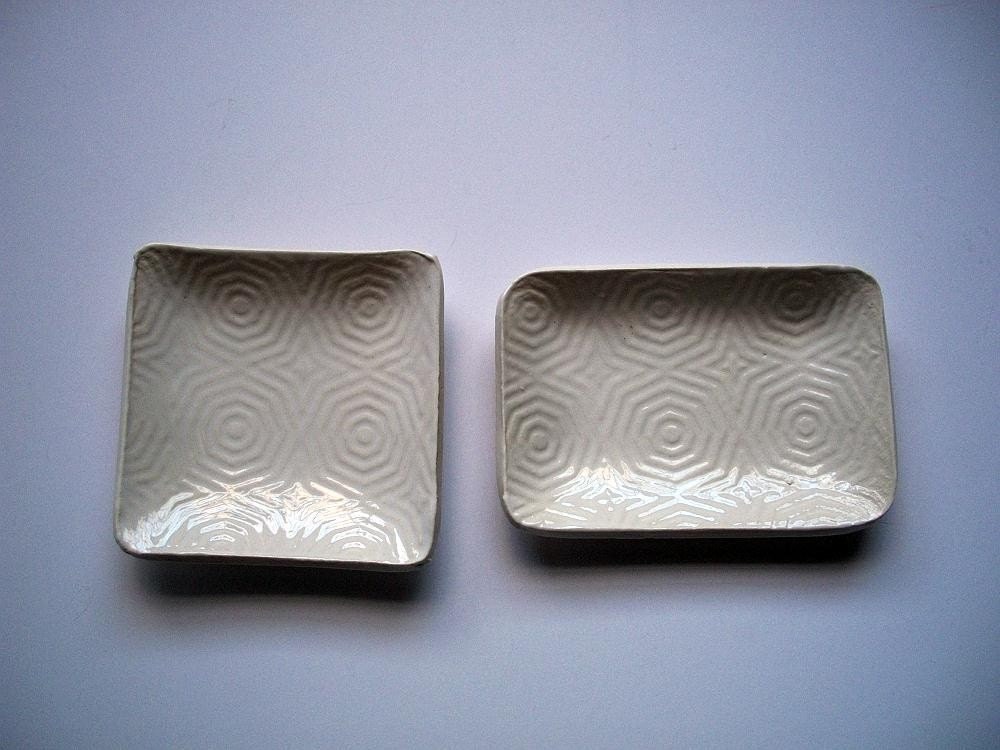
The ring dish should've been one of those easy items - "should" being the operative word here. Mr. FW spent an hour or two combing Etsy to find a few good options, one of which we both agreed would be perfect for us.
One dish for the wedding, one to go on my nightstand right away. Affordable, patterned but simple, our choice of colors, and the seller would create a hole in one of them so that we could tie on the rings. Perfect!
When the box arrived I was so excited to see how the dishes turned out, and I knew that this project would be SO EASY to finish once I tied on a little ribbon. Uh huh... I pulled out some stand-in rings and my bag of ribbon, then the over-complicated, over-thinking, annoyingly-Goldilocksish mentality set in.
It all started there, and it moved on to this...
After several hours of ribbon tying, what-oh-what did we end up with?
If you guessed "right back where you started" then you win the prize. Yep - Mr. FW really liked the simplicity of that one. By this point I kinda hated all ribbon, nothing looked good to me any more, and I was desperate - desperate, I tell you - to just finish this project and go to bed. So, simple blue ribbon is "just right" for us.
Finally this project was done. But more than that, the point was clearly made that I really, really need to put a lid on this over-complicating tendency I have or we're never going to finish things in time for the wedding.
This should have been so easy...
What Goldilocks wedding moments have you experienced and how did you finally reach your "just right" solution?
The ring dish should've been one of those easy items - "should" being the operative word here. Mr. FW spent an hour or two combing Etsy to find a few good options, one of which we both agreed would be perfect for us.
image from Etsy shop Cats Paw Pottery
One dish for the wedding, one to go on my nightstand right away. Affordable, patterned but simple, our choice of colors, and the seller would create a hole in one of them so that we could tie on the rings. Perfect!
{the color is more silvery and shiny than it looks in this picture}
When the box arrived I was so excited to see how the dishes turned out, and I knew that this project would be SO EASY to finish once I tied on a little ribbon. Uh huh... I pulled out some stand-in rings and my bag of ribbon, then the over-complicated, over-thinking, annoyingly-Goldilocksish mentality set in.
{"This one is too simple."}
It all started there, and it moved on to this...
{Top L-R: too unattractive, too strange, too pretty, too big; Bottom L-R: too busy, too overpowering, too much, too many bows}
After several hours of ribbon tying, what-oh-what did we end up with?
{"Just right."}
If you guessed "right back where you started" then you win the prize. Yep - Mr. FW really liked the simplicity of that one. By this point I kinda hated all ribbon, nothing looked good to me any more, and I was desperate - desperate, I tell you - to just finish this project and go to bed. So, simple blue ribbon is "just right" for us.
Finally this project was done. But more than that, the point was clearly made that I really, really need to put a lid on this over-complicating tendency I have or we're never going to finish things in time for the wedding.
This should have been so easy...
What Goldilocks wedding moments have you experienced and how did you finally reach your "just right" solution?
Wednesday, August 3, 2011
We Are Ballers... String Ballers
My mom was kind enough to visit us recently to lend her wedding elf services. (Thanks, Mom!) Little did she know she'd be spending her time out here developing an intimate relationship with balls. We're talking large balls, small balls, fragile balls, scattered balls, stacked balls, and everyone's favorite - flaky balls. Oh yeah, we were ballin' out of control, and I'm just dying to show you what we accomplished.
I'm so proud, and so relieved, to to say that this box contains 136 small, black and white string balls. Tutorials for these things are all over the internet, but I'll add my two cents as well. And if you want to see our mock-up of how we plan to use these beauties, just scroll straight to the bottom of this post. I won't be upset. :-)
The materials were incredibly cheap given the visual impact they'll make, but it is a project that requires a lot of time and patience. We started with a box full of small ballons, Stiffy fabric stiffener, size 3 crochet thread, and a glass bowl to hold the fabric stiffener. We experimented with embroidery floss because it's cheap and comes in so many colors, but the resulting ball didn't hold it's shape. And if I had it all to do over again I would get white or clear balloons because sometimes the balloon color rubbed off on the white string.
We learned the hard way that the trick to getting nice, clean string balls that aren't full of glue flakes is to DILUTE the fabric stiffener with a bit of water before you start. I can't stress this enough, and I promise you will thank me for sharing this with you. Even just a little bit of water makes a huge difference. I also suggest 'rounding' your balloons before you get started so your string balls look less balloon-like. Soak your thread in the fabric stiffener mixture and then 'squeeze' out the excess before placing the string on your balloon. I found it easier to soak and squeeze a long length of string at a time so that I could wrap more continuously, but you don't want to do too much at once because the string will knot and the glue will start to dry.
Some tutorials suggest tying the string onto the balloon before you start wrapping, but we found that made it much more difficult to remove the balloon after the string dried. So we just laid the string on the balloon and then wrapped it a few times to stabilize the end of the thread.
By the time I'd made a couple dozen of these, I had developed a wrapping system that was faster and resulted in a rounder shape. It's hard to explain, but imagine your balloon is a globe and the balloon knot is at the North Pole. I started wrapping my string 3-4 times around the 'equator,' then I wrapped it from the North to South pole and pulled the string tightly, which pushes out the air in the middle of the balloon. You'll be able to see it getting rounder. To hold that shape, continue wrapping from north to south all around the balloon. The outcome looks a bit like a pumpkin with vertical lines going all the way around.
Once that shape is formed, you can wrap string to your little heart's content until you're happy with the look. Cut the string and then loop the end twice under another string on the balloon. This will keep it from unwrapping and/or becoming loose while it's drying. To string them up, we poked a paper clip through the knot and hung it on a line running through our house. They're so pretty this way, you might not want to pop them!
Give them 24 hours to dry, then pop the balloons with a straight pin. Some of them will deflate right away, and some will slowly unstick themselves from the string over the course of a few minutes. Hopefully you'll then have a perfectly formed string ball with no unsightly flakes.
Here were our final stats: We were able to get about thirty 3-4" balls per bottle of fabric stiffener and twelve small balls (or three large 8-10" balls) per spool of thread. Once we had a routine going, each of us were able to make about ten small balls per hour or three large balls per hour. Total cost of all centerpieces for twelve 8-foot tables (including string, fabric stiffener, balloons, hurricane vases, and tealight candles) is $202.47 or $16.87 per table. Not too shabby!
If you made it this far, then I'll reward you with a picture of our centerpiece mock-up. The only thing we have in our house that's eight feet long (like our reception tables) is our window seat, so you'll have to forgive the bright back-lighting. Imagine this with a very light gray tablecloth, sapphire blue tealight candles in the votives, and a hurricane vase that's just a smidge taller. If you've got all that in your mind, then you're picturing our centerpieces!
Love. LOVE! Oh, how I adore seeing it all come together like this! It's so satisfying to know that all of our hard work is paying off - both in dollars and in aesthetics. *happy sigh*
What wedding project has been particularly rewarding for you?
I'm so proud, and so relieved, to to say that this box contains 136 small, black and white string balls. Tutorials for these things are all over the internet, but I'll add my two cents as well. And if you want to see our mock-up of how we plan to use these beauties, just scroll straight to the bottom of this post. I won't be upset. :-)
The materials were incredibly cheap given the visual impact they'll make, but it is a project that requires a lot of time and patience. We started with a box full of small ballons, Stiffy fabric stiffener, size 3 crochet thread, and a glass bowl to hold the fabric stiffener. We experimented with embroidery floss because it's cheap and comes in so many colors, but the resulting ball didn't hold it's shape. And if I had it all to do over again I would get white or clear balloons because sometimes the balloon color rubbed off on the white string.
We learned the hard way that the trick to getting nice, clean string balls that aren't full of glue flakes is to DILUTE the fabric stiffener with a bit of water before you start. I can't stress this enough, and I promise you will thank me for sharing this with you. Even just a little bit of water makes a huge difference. I also suggest 'rounding' your balloons before you get started so your string balls look less balloon-like. Soak your thread in the fabric stiffener mixture and then 'squeeze' out the excess before placing the string on your balloon. I found it easier to soak and squeeze a long length of string at a time so that I could wrap more continuously, but you don't want to do too much at once because the string will knot and the glue will start to dry.
Some tutorials suggest tying the string onto the balloon before you start wrapping, but we found that made it much more difficult to remove the balloon after the string dried. So we just laid the string on the balloon and then wrapped it a few times to stabilize the end of the thread.
By the time I'd made a couple dozen of these, I had developed a wrapping system that was faster and resulted in a rounder shape. It's hard to explain, but imagine your balloon is a globe and the balloon knot is at the North Pole. I started wrapping my string 3-4 times around the 'equator,' then I wrapped it from the North to South pole and pulled the string tightly, which pushes out the air in the middle of the balloon. You'll be able to see it getting rounder. To hold that shape, continue wrapping from north to south all around the balloon. The outcome looks a bit like a pumpkin with vertical lines going all the way around.
Once that shape is formed, you can wrap string to your little heart's content until you're happy with the look. Cut the string and then loop the end twice under another string on the balloon. This will keep it from unwrapping and/or becoming loose while it's drying. To string them up, we poked a paper clip through the knot and hung it on a line running through our house. They're so pretty this way, you might not want to pop them!
Give them 24 hours to dry, then pop the balloons with a straight pin. Some of them will deflate right away, and some will slowly unstick themselves from the string over the course of a few minutes. Hopefully you'll then have a perfectly formed string ball with no unsightly flakes.
Here were our final stats: We were able to get about thirty 3-4" balls per bottle of fabric stiffener and twelve small balls (or three large 8-10" balls) per spool of thread. Once we had a routine going, each of us were able to make about ten small balls per hour or three large balls per hour. Total cost of all centerpieces for twelve 8-foot tables (including string, fabric stiffener, balloons, hurricane vases, and tealight candles) is $202.47 or $16.87 per table. Not too shabby!
If you made it this far, then I'll reward you with a picture of our centerpiece mock-up. The only thing we have in our house that's eight feet long (like our reception tables) is our window seat, so you'll have to forgive the bright back-lighting. Imagine this with a very light gray tablecloth, sapphire blue tealight candles in the votives, and a hurricane vase that's just a smidge taller. If you've got all that in your mind, then you're picturing our centerpieces!
Love. LOVE! Oh, how I adore seeing it all come together like this! It's so satisfying to know that all of our hard work is paying off - both in dollars and in aesthetics. *happy sigh*
What wedding project has been particularly rewarding for you?
Thursday, July 21, 2011
14 Hours and Counting (The Invite Madness Begins)
I've been trying not to notice the time, but having typed out that sentence I just couldn't help but steal a glance at the clock on my computer. It's 3:24 a.m. and I'm wrapping up my wedding planning for the night. By my sleep-deprived estimation I've spent at least fourteen hours today on my computer - each and every one of those hours dedicated to brainstorming and drafting ideas for our invitations.
Luckily for me, we've finalized some of our other paper products and that gives me some stylistic direction for the invites. Unluckily for me is that I can't visualize ideas. Either that, or I don't trust my visualizations. Whatever it is, I'm a person who has to make a prototype or create a digital mock-up or *something* before I'll have the slightest clue whether or not I like a particular idea. I don't need it to be pretty - just something that gives me a rough idea of what the end product might look like. Also terribly unfortunate for me is my relative lack of skill with graphics programs, meaning that I'm constantly googling "how to do ____ in Photoshop Elements."
Key words: rough, lack of skill
That's how I wind up with my computer desktop chock full of icons (and I hate a desktop full of icons!) for a zillion different versions of images like this.
I can't believe I'm actually posting a picture of my work in progress, but there's your window into the way my mind works. Chaotic, no? As hard as it might be to believe, that craptastic illustration is where all the magic starts for me. In case you were curious as to what you're looking at, that's a potential layout for a 5x7 pocketfold. Starting on the left we have a (horribly rendered) pointed flap lined with stripes, leading to the main invite in the middle (where you can clearly *ahem* see where the words and the graphics go, right?), and the enclosures in a pocket on the right-hand side that's also lined with stripes and may potentially feature a photo of us.
No doubt I would've done a similar layout even if we were going to order our invites from a printer, just because it gives me a chance to see how everythings fits together. But because we plan to DIY them, laying out all the individual elements like this gives me an opportunity to think about how each part needs to be made, what's feasible and what's not, how they'll have to be layered and adhered, what supplies we'll need, etc.
It also gives me ample time to consider the likely possibility that we've bitten off more than we can chew here. SO many individual parts. SO many steps to put it all together. SO little time to get it all done. And ALL that for something people will just throw away. I don't know why this is so important to me, except to say that it is. I cherish the way Mr. FW and I collaborate on creative tasks like this (even if we drive each other crazy sometimes), and I love the idea that when it's all finished we'll have this amazing memento we made with our own hands.
That said, we're not even done designing them yet and already I can't wait to cross them off the list!
What project did you or will you take on, knowing full well it's probably more than you can reasonably handle? What's YOUR explanation for that?
Luckily for me, we've finalized some of our other paper products and that gives me some stylistic direction for the invites. Unluckily for me is that I can't visualize ideas. Either that, or I don't trust my visualizations. Whatever it is, I'm a person who has to make a prototype or create a digital mock-up or *something* before I'll have the slightest clue whether or not I like a particular idea. I don't need it to be pretty - just something that gives me a rough idea of what the end product might look like. Also terribly unfortunate for me is my relative lack of skill with graphics programs, meaning that I'm constantly googling "how to do ____ in Photoshop Elements."
Key words: rough, lack of skill
That's how I wind up with my computer desktop chock full of icons (and I hate a desktop full of icons!) for a zillion different versions of images like this.
{amidst this craziness, a little sneak peek of our engagement pics!}
I can't believe I'm actually posting a picture of my work in progress, but there's your window into the way my mind works. Chaotic, no? As hard as it might be to believe, that craptastic illustration is where all the magic starts for me. In case you were curious as to what you're looking at, that's a potential layout for a 5x7 pocketfold. Starting on the left we have a (horribly rendered) pointed flap lined with stripes, leading to the main invite in the middle (where you can clearly *ahem* see where the words and the graphics go, right?), and the enclosures in a pocket on the right-hand side that's also lined with stripes and may potentially feature a photo of us.
No doubt I would've done a similar layout even if we were going to order our invites from a printer, just because it gives me a chance to see how everythings fits together. But because we plan to DIY them, laying out all the individual elements like this gives me an opportunity to think about how each part needs to be made, what's feasible and what's not, how they'll have to be layered and adhered, what supplies we'll need, etc.
It also gives me ample time to consider the likely possibility that we've bitten off more than we can chew here. SO many individual parts. SO many steps to put it all together. SO little time to get it all done. And ALL that for something people will just throw away. I don't know why this is so important to me, except to say that it is. I cherish the way Mr. FW and I collaborate on creative tasks like this (even if we drive each other crazy sometimes), and I love the idea that when it's all finished we'll have this amazing memento we made with our own hands.
That said, we're not even done designing them yet and already I can't wait to cross them off the list!
What project did you or will you take on, knowing full well it's probably more than you can reasonably handle? What's YOUR explanation for that?
Monday, July 18, 2011
The Evolution of Inspiration
Are you ready to hear something utterly, mind-bogglingly unbelievable? It's the kind of ridiculousness I can only assume applies most often to intense planner-types like yours truly (but if it extends even further, I'd love to hear about it). Just what is this ridiculosity? Well, while searching through my wedding files the other day I came across an inspiration board that I made, and the creation date on the file is...
...wait for it...
May 30, 2009. Just let that sink in. Count the months. Do the mental math.
Umm... yeah, that's more than two freaking years ago. How *crazy* is that?! No lie, no exaggeration - Mr. FW and I made this inspiration board a full-on year before we got engaged. Yep, you heard that right - wedding style first, engagement ring second. Just for kicks, let's take a look at that wedding style, shall we?
Looking back on this board, I gotta say that I'm incredibly proud of us (and mostly me) that we've managed to keep the same basic color scheme for more than twenty-four months now without changing our minds about it. Obviously, though, two years is a really long time to hold anything constant and it's clear to me that our overall aesthetic has veered towards a more modern, monochromatic look. For instance, there's a lot about this board that still makes my heart skip a beat (attire, anenomes, mix-and-match black/white patterns), but the Moroccan-style lamps, feathers, white linens with blue sashes, ornamental cake decoration, and the more general paisley theme are all items that have hit the cutting room floor.
We've changed in the last two years, our preferences have changed, and our wedding has changed right along with us. Which is a good thing, right? I'm so very thrilled with the wedding that lives in my head right now, and the wedding that's materializing with every new project we complete, that I hope it doesn't go through many more changes in the next few months. (That, and I honestly don't think I could take it!) But since I'm pretty sure I won't be making another inspiration board, at least I won't have photographic evidence of any changes that do happen.
How did your wedding style evolve over time?
...wait for it...
May 30, 2009. Just let that sink in. Count the months. Do the mental math.
Umm... yeah, that's more than two freaking years ago. How *crazy* is that?! No lie, no exaggeration - Mr. FW and I made this inspiration board a full-on year before we got engaged. Yep, you heard that right - wedding style first, engagement ring second. Just for kicks, let's take a look at that wedding style, shall we?
![]() |
| {my sincere apologies that I don't recall the sources for any of these pictures} |
Looking back on this board, I gotta say that I'm incredibly proud of us (and mostly me) that we've managed to keep the same basic color scheme for more than twenty-four months now without changing our minds about it. Obviously, though, two years is a really long time to hold anything constant and it's clear to me that our overall aesthetic has veered towards a more modern, monochromatic look. For instance, there's a lot about this board that still makes my heart skip a beat (attire, anenomes, mix-and-match black/white patterns), but the Moroccan-style lamps, feathers, white linens with blue sashes, ornamental cake decoration, and the more general paisley theme are all items that have hit the cutting room floor.
We've changed in the last two years, our preferences have changed, and our wedding has changed right along with us. Which is a good thing, right? I'm so very thrilled with the wedding that lives in my head right now, and the wedding that's materializing with every new project we complete, that I hope it doesn't go through many more changes in the next few months. (That, and I honestly don't think I could take it!) But since I'm pretty sure I won't be making another inspiration board, at least I won't have photographic evidence of any changes that do happen.
How did your wedding style evolve over time?
Friday, July 8, 2011
Dressing Inanimate Objects
What inanimate objects get dressed up for a wedding? Tables and chairs, of course!
Naked Fully Clothed
So now I know you'll also believe me when I say that I (oh, I of the "anything to make my life more complicated" mentality) will not be utilizing white or ivory floor-length tablecloths OR chair covers for our wedding reception. And why is that? Well, basically because I'm a moron with a sadistic streak. That, or I've fallen victim to the gorgeousness that is images like this.
The ribbons say "fun" and "handmade" and "unique," while the gray tablecloths say "different" and "modern" and "I coordinate with your wedding colors." I am a sucker for ribbons and for all things gray, so why not give them both a starring role at our wedding reception? Besides, we're just not fans of white chair covers and white table linens. For one, it's a little bright given that we're aiming for a City at Night feel. For two, it's a little Traditional Ballroom Reception for our taste. Yes, it's a little extra money for something that we otherwise wouldn't have to pay a penny for - I get that. But I plan to go on the *cheap*cheap*cheap* with this project, which makes it much more do-able.
I'm still sourcing table linen purchase/rental options, so I'll have to get back to you about that. But we have finalized the ribbon portion of the project. A few months ago Mr. FW and I went to Michael's and went nuts in the ribbon section. I wish I had a picture of me accidentally unrolling 2 spools of ribbon all the way down-and-out the aisle while Mr. FW chased after. Alas, all I have to offer you are these pictures of our painstakingly chosen coordinating ribbons hanging off a hanger against our gray bedroom wall.
I know, I know. It doesn't look as fully and breezy as those ribbon images above, but we thought a more minimalist approach better fit the vibe our our wedding, Plus, having fewer ribbons means we kept our expenses lower AND we increased the chances that whoever has to tie these ~320 knots will only want to kill us one-half or even one-third as much as they would have otherwise once we tell them this is the task we've assigned to them. Mwahahahahaaaaaa!
The black, silver and white ribbon are coming from COD Wholesale, where I paid $53 (including shipping) for 200 yards each of 7/8" double-faced satin ribbon in black and silver, and 5/8" double-faced satin in white. Then I found the black with white stitched grosgrain ribbon at papermart.com, where 125 yards of 5/8" ribbon cost $20. Total ribbon cost: $75, or right about $1/chair. With this much ribbon I'm ensuring that we have more than enough for the chairs plus plenty of leftovers for other crafts potentially needing a ribbony touch. Now that all of the ribbon has been cut, ironed, "collated," and is hanging and ready to go in our basement, we're pretty darn pleased with ourselves.
Is there anything you could have gotten for free, but you decided to spend extra money anyway? Please tell me I'm not the only one...
Naked Fully Clothed
And in true Ms. Ferris Wheel fashion, I have decided to make this infinitely more difficult for myself. Would you believe me if I told you that white or ivory floor-length tablecloths AND chair covers are INCLUDED in our wedding package?! Of course you'd believe me. Why would I lie to you about something like that? I wouldn't.
So now I know you'll also believe me when I say that I (oh, I of the "anything to make my life more complicated" mentality) will not be utilizing white or ivory floor-length tablecloths OR chair covers for our wedding reception. And why is that? Well, basically because I'm a moron with a sadistic streak. That, or I've fallen victim to the gorgeousness that is images like this.
bottom photos by Jose Villa
image via Green Wedding Shoes; photos by Lisa Lefkowitz
photo by Geoff White
image via Weddingbee Classifieds
I'm still sourcing table linen purchase/rental options, so I'll have to get back to you about that. But we have finalized the ribbon portion of the project. A few months ago Mr. FW and I went to Michael's and went nuts in the ribbon section. I wish I had a picture of me accidentally unrolling 2 spools of ribbon all the way down-and-out the aisle while Mr. FW chased after. Alas, all I have to offer you are these pictures of our painstakingly chosen coordinating ribbons hanging off a hanger against our gray bedroom wall.
I know, I know. It doesn't look as fully and breezy as those ribbon images above, but we thought a more minimalist approach better fit the vibe our our wedding, Plus, having fewer ribbons means we kept our expenses lower AND we increased the chances that whoever has to tie these ~320 knots will only want to kill us one-half or even one-third as much as they would have otherwise once we tell them this is the task we've assigned to them. Mwahahahahaaaaaa!
The black, silver and white ribbon are coming from COD Wholesale, where I paid $53 (including shipping) for 200 yards each of 7/8" double-faced satin ribbon in black and silver, and 5/8" double-faced satin in white. Then I found the black with white stitched grosgrain ribbon at papermart.com, where 125 yards of 5/8" ribbon cost $20. Total ribbon cost: $75, or right about $1/chair. With this much ribbon I'm ensuring that we have more than enough for the chairs plus plenty of leftovers for other crafts potentially needing a ribbony touch. Now that all of the ribbon has been cut, ironed, "collated," and is hanging and ready to go in our basement, we're pretty darn pleased with ourselves.
Is there anything you could have gotten for free, but you decided to spend extra money anyway? Please tell me I'm not the only one...
Random Facts and Cocktails
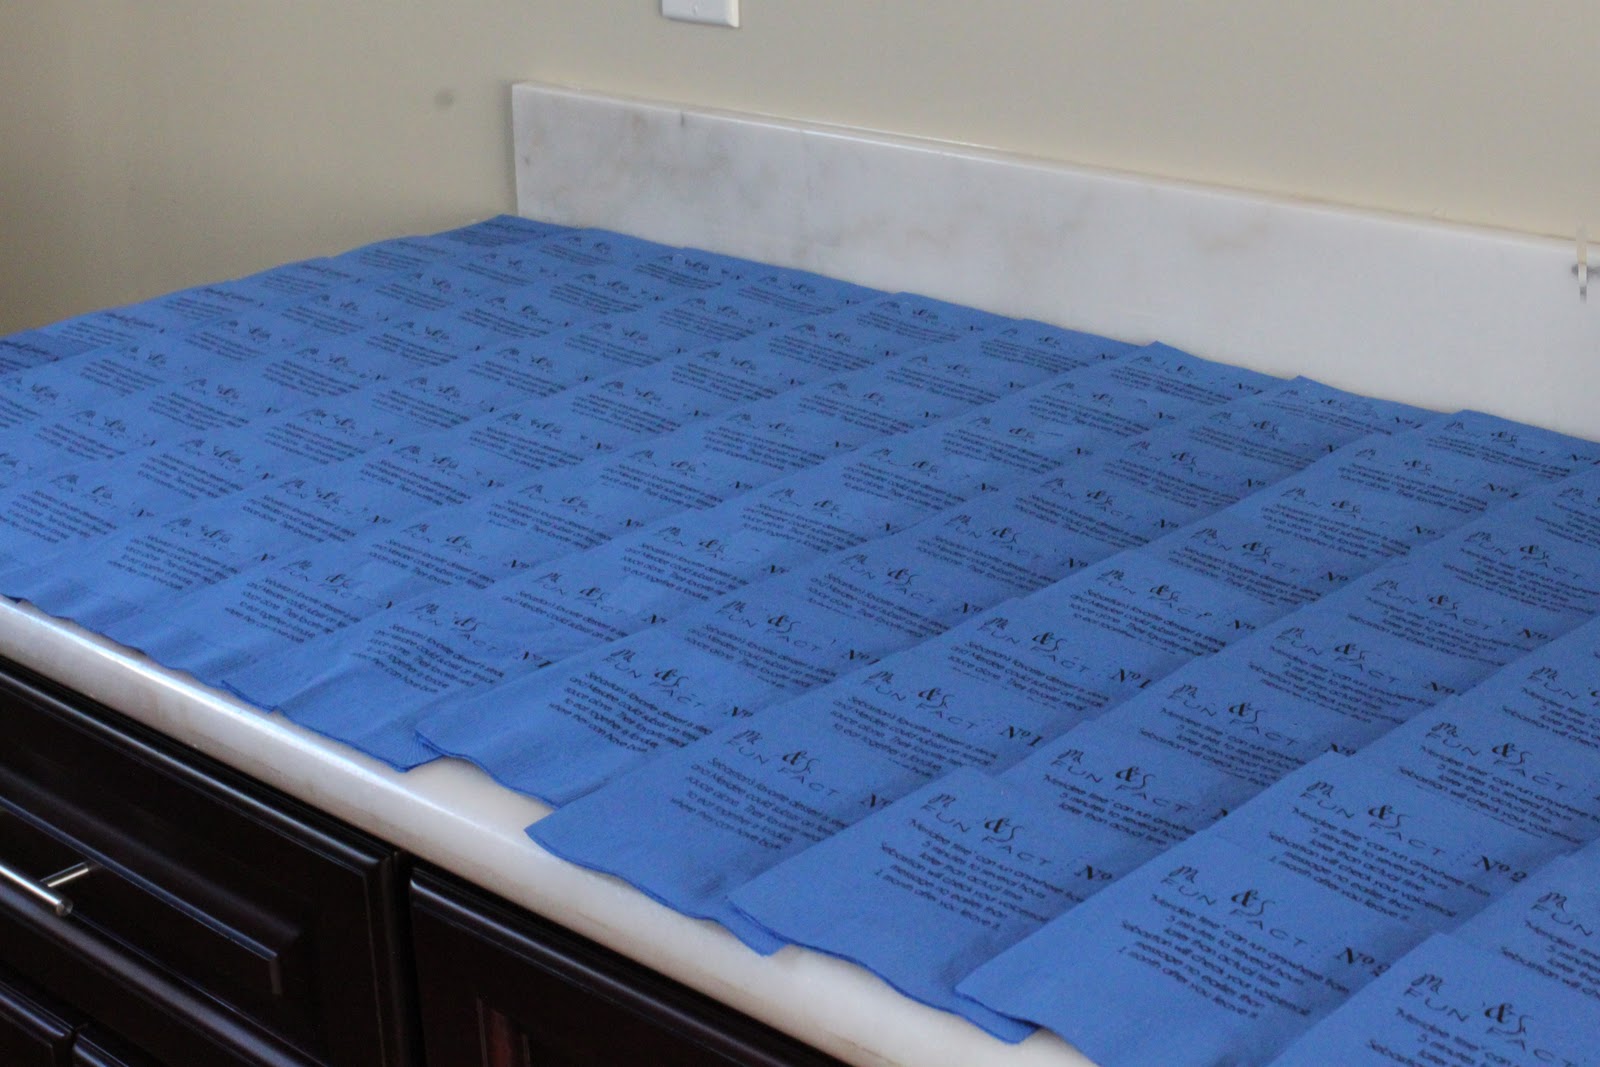
Way back in the day when I first saw a blog post about cocktail napkins personalized with fun facts, I immediately shared the idea with Mr. FW and we both thought it was genius! I mean, who wouldn't love to go to a wedding and learn a little bit about the couple every time they grab a drink?
Before I get to the tutorial, a few caveats. #1: I shamelessly stole the layout design from Mrs. Cupcake, so I want to give full credit where it's due. #2: I used a Gocco for this, and the materials for Gocco have gotten crazy expensive since they're no longer being manufactured. I'm sure there are other ways to do this such as the Yudu, but I have no experience with it. #3: I avoided this project for a while because I worried it wouldn't work and/or that it would take too long, but in actuality it took me about 2 hours to lay out the design, less than 30 minutes to burn the screens, and about 2 hours to print the napkins. That was it! Seriously my shortest project yet.
First step: Get the image ready for the Gocco. I used Photoshop Elements to lay out the design, and I sized each fact to be less than 3.5" by 2.75" so I could preserve precious Gocco resources by fitting two facts on each screen. Once printed, the design needs to be photocopied so that the image will be carbon-based (which is what the Gocco needs in order to burn a screen). I used the "artwork clean-up method" to "remove excess carbon" from your copy, and all that means is I put a piece of parchment paper on top of the copy and then I ironed it. I have no idea if this helps or not, but I wasn't taking any chances.
Second step: Burn the screens. I used a white 4x6 piece of paper on top of the Gocco pad to lay out the two facts I wanted to burn on the screen. Slide the blue filter into the Gocco first (because you're burning a photocopy), then the unburned screen. When you close the lid you can look through the window to ensure the layout looks the way you want it to. If everything looks good, insert your bulbs into the bulb housing and lower the housing onto the top of the Gocco. Recruit your partner to do the exciting work of pressing down firmly on the lid of the Gocco until you see a flash. Remove the bulb housing and be sure both bulbs flashed. (They'll be brown and hazy.) When you raise the lid, you'll see that the image is now stuck to the screen. Carefully peel it off and admire your burned screen.
Third Step: Prepare the screen for printing. When I looked closely at my screen, I saw a tiny area where the screen hadn't properly burned away. You'll be able to recognize this because part of your image will still be shiny rather than matte. In the image below, see how the leg of the M isn't burned? You can fix this by oh-so-carefully using a straight pin to scratch away the coating.
Raise the clear sheet and apply ink block to the screen. Ink block is supposed to keep one color from bleeding into another, but I also use it to save ink by keeping the ink from spreading out too far. So I just wrap the ink block around the image and through any unused space. Now choose your ink color. We spread some potential ink colors onto one of our blue cocktail napkins to get a sense for the contrast level between ink and napkin. Although I thought we'd love the grays, we ended up choosing the black and I was really happy with how it turned out.
Before you load your ink onto the screen, put your screen on a scrap piece of paper so the ink doesn't bleed through onto your table. Then spread the ink evenly over your image and lower the clear plastic cover. Insert your screen back into the Gocco with the plastic cover toward the top window of the machine. Put some scrap paper onto the Gocco pad and press down firmly on the front two corners of the lid to make a test print. Now is the time to make any needed changes - add more ink, spread out the ink, figure out what kind of pressure you need to use for your particular combination of ink consistency and paper absorbency. Then you're ready to move onto the real thing.
Fourth Step: Line everything up to make your print. My Gocco PG-10 has a registration plate and a moveable print pad, which I find extremely useful. The registration plate is basically just a piece of plastic that snaps into the machine. You stamp your image onto the plate, then put your paper (or napkin) under the plate and move the printing pad around until everything is centered/lined-up the way you want it to be. At that point, you want to make an L shape out of something sturdy (I used the cardboard sides of a tissue box) and stick it down to the adhesive plate along the corner of whatever you're printing. This will allow you to easily place your paper in the same spot for each print, and I promise it will save you a lot of time when you're printing hundreds of items back-to-back. Once your L guide is in place, you can remove the registration plate and begin printing.
Fifth Step: Print your image. Happily begin printing away. If you're printing napkins, as I was, you'll need to reach under the lid and hold down the top layer of the napkin as you open the lid otherwise it will stick to the screen and smear your ink. Continually check the quality of your prints so you can tell when to re-ink the screen. Either you'll notice the ink getting much lighter or there will be places that don't print at all. Be sure to have a lot of space available for drying. The prints shouldn't be stacked for at least 24 hours to be sure they're completely dry. When you're ready to switch from one fact to another, take the screen out, lift up the clear plastic sheet, scrape off the excess ink and transfer it to the new area you'd like to print. You can then cover the old fact with sticky notes so they can be easily removed later if you want to reuse the screen.
Sixth Step: Clean and store your image. Apply Gocco screen cleaner and wipe with a (million) paper towel(s) until you can readily see light through all of the burned parts of the image. Then you can safely store the screen in case you need to print more of your design at some point in the future. For us, this is helpful in case we have more RSVP's than we expect.
Sorry for the long post, but I know that before striking out on my own I read a lot of Gocco tutorials and I preferred an overabundance of details rather than too little information. Feel free to let me know if you have any questions. I'm no Gocco expert by any means, but I'm happy to share what little knowledge I do have - because everyone should get a chance to be this giddy about cocktail napkins! Let's hope our guests love them even a tenth as much as we do.
So tell me, do you have a Gocco? What projects do you use it for? What questions do you have?
{and it looks SO much better when I don't have to remove our names. *sigh*}
Before I get to the tutorial, a few caveats. #1: I shamelessly stole the layout design from Mrs. Cupcake, so I want to give full credit where it's due. #2: I used a Gocco for this, and the materials for Gocco have gotten crazy expensive since they're no longer being manufactured. I'm sure there are other ways to do this such as the Yudu, but I have no experience with it. #3: I avoided this project for a while because I worried it wouldn't work and/or that it would take too long, but in actuality it took me about 2 hours to lay out the design, less than 30 minutes to burn the screens, and about 2 hours to print the napkins. That was it! Seriously my shortest project yet.
First step: Get the image ready for the Gocco. I used Photoshop Elements to lay out the design, and I sized each fact to be less than 3.5" by 2.75" so I could preserve precious Gocco resources by fitting two facts on each screen. Once printed, the design needs to be photocopied so that the image will be carbon-based (which is what the Gocco needs in order to burn a screen). I used the "artwork clean-up method" to "remove excess carbon" from your copy, and all that means is I put a piece of parchment paper on top of the copy and then I ironed it. I have no idea if this helps or not, but I wasn't taking any chances.
Second step: Burn the screens. I used a white 4x6 piece of paper on top of the Gocco pad to lay out the two facts I wanted to burn on the screen. Slide the blue filter into the Gocco first (because you're burning a photocopy), then the unburned screen. When you close the lid you can look through the window to ensure the layout looks the way you want it to. If everything looks good, insert your bulbs into the bulb housing and lower the housing onto the top of the Gocco. Recruit your partner to do the exciting work of pressing down firmly on the lid of the Gocco until you see a flash. Remove the bulb housing and be sure both bulbs flashed. (They'll be brown and hazy.) When you raise the lid, you'll see that the image is now stuck to the screen. Carefully peel it off and admire your burned screen.
Third Step: Prepare the screen for printing. When I looked closely at my screen, I saw a tiny area where the screen hadn't properly burned away. You'll be able to recognize this because part of your image will still be shiny rather than matte. In the image below, see how the leg of the M isn't burned? You can fix this by oh-so-carefully using a straight pin to scratch away the coating.
Raise the clear sheet and apply ink block to the screen. Ink block is supposed to keep one color from bleeding into another, but I also use it to save ink by keeping the ink from spreading out too far. So I just wrap the ink block around the image and through any unused space. Now choose your ink color. We spread some potential ink colors onto one of our blue cocktail napkins to get a sense for the contrast level between ink and napkin. Although I thought we'd love the grays, we ended up choosing the black and I was really happy with how it turned out.
Before you load your ink onto the screen, put your screen on a scrap piece of paper so the ink doesn't bleed through onto your table. Then spread the ink evenly over your image and lower the clear plastic cover. Insert your screen back into the Gocco with the plastic cover toward the top window of the machine. Put some scrap paper onto the Gocco pad and press down firmly on the front two corners of the lid to make a test print. Now is the time to make any needed changes - add more ink, spread out the ink, figure out what kind of pressure you need to use for your particular combination of ink consistency and paper absorbency. Then you're ready to move onto the real thing.
Fourth Step: Line everything up to make your print. My Gocco PG-10 has a registration plate and a moveable print pad, which I find extremely useful. The registration plate is basically just a piece of plastic that snaps into the machine. You stamp your image onto the plate, then put your paper (or napkin) under the plate and move the printing pad around until everything is centered/lined-up the way you want it to be. At that point, you want to make an L shape out of something sturdy (I used the cardboard sides of a tissue box) and stick it down to the adhesive plate along the corner of whatever you're printing. This will allow you to easily place your paper in the same spot for each print, and I promise it will save you a lot of time when you're printing hundreds of items back-to-back. Once your L guide is in place, you can remove the registration plate and begin printing.
Fifth Step: Print your image. Happily begin printing away. If you're printing napkins, as I was, you'll need to reach under the lid and hold down the top layer of the napkin as you open the lid otherwise it will stick to the screen and smear your ink. Continually check the quality of your prints so you can tell when to re-ink the screen. Either you'll notice the ink getting much lighter or there will be places that don't print at all. Be sure to have a lot of space available for drying. The prints shouldn't be stacked for at least 24 hours to be sure they're completely dry. When you're ready to switch from one fact to another, take the screen out, lift up the clear plastic sheet, scrape off the excess ink and transfer it to the new area you'd like to print. You can then cover the old fact with sticky notes so they can be easily removed later if you want to reuse the screen.
Sixth Step: Clean and store your image. Apply Gocco screen cleaner and wipe with a (million) paper towel(s) until you can readily see light through all of the burned parts of the image. Then you can safely store the screen in case you need to print more of your design at some point in the future. For us, this is helpful in case we have more RSVP's than we expect.
Sorry for the long post, but I know that before striking out on my own I read a lot of Gocco tutorials and I preferred an overabundance of details rather than too little information. Feel free to let me know if you have any questions. I'm no Gocco expert by any means, but I'm happy to share what little knowledge I do have - because everyone should get a chance to be this giddy about cocktail napkins! Let's hope our guests love them even a tenth as much as we do.
So tell me, do you have a Gocco? What projects do you use it for? What questions do you have?
Tuesday, July 5, 2011
About the Bouts
This long holiday weekend saw the completion of phase one of what I'm dubbing Project Floral Creations. (Have I mentioned that we aren't using any real flowers in our wedding? Well, we're not. And now that I've remembered to inform you of that, this post is gonna make a lot more sense!) The list of florals that need to be created isn't all that long, but it's felt really daunting because I assumed that everything would take a long time to complete. And if phase one is any indication, I was absolutely right about that. Thankfully I'm super pleased with the final outcome.
In case you couldn't tell (and I hope that's not the case), these are our boutonnieres. Over a year ago I saw an inspiration picture of grosgrain ribbon flower bouts and I thought the idea was fabulously fun, chic, and totally DIY-able. Mr. FW agreed and thus the plan was born. The steps were all pretty simple, but because I'm meticulous to a fault they each took an inordinately long time. In case you're interested, here's the step-by-step.
First you stitch down one side, either with the sewing machine or by hand. Knot the thread on one end and then pull the string on the other end (or one of the two strings, if you're using a sewing machine) until it gathers by an amount that will work for the size of the ribbon and the shape of the flower you're trying to make. Then you simply knot off the other end to hold the gather.
Hot glue one end of the gathered ribbon to the other, forming a (sometimes wonky-looking) circle. You're then going to hot glue a piece of felt to the back of each flower to hold the shape and to make it more sturdy.
Now for the flower centers. I know a lot of other people use buttons or beads, but we wanted a more substantial center that wasn't visibly button-like. I considered using buttons with shanks on the backs, and they would've been infinitely easier. But they were also more money than I wanted to spend and I knew tissue paper could give a similar look, so I went that route.
To do this, you start with a tissue paper ball roughly the size of the center you want. Bury the tip of your floral wire inside this ball and then wrap one or two layers of smooth tissue paper around both of them. Use floral tape to secure the tissue paper.
Make a hole in your felt center that's large enough to accommodate the tape-wrapped stem, then use a little hot glue to secure the ribbon flower onto the tissue paper center. To complete the look you can use some needle-nose pliers to bend the stem down. Then step back and admire your finished flower.

For Mr. FW's bout I incorporated a glass tile with a picture of his/our dog, Patches. I just needed to build up the center of the flower with some additional felt before I attached the tile with hot glue. My/our dog Eli has a matching tile that will probably be featured on my bouquet. This way we can have the dogs with us on our wedding day, even if they can't be physically present.
To put everything together, just bend the stems to place the flowers where you want them. A thin floral wire will secure them while you work. (In this picture you can see the two different kinds of backs I used - one as described and one where I just sandwiched the stem between two circles of felt. For that method I glued the tissue paper balls onto the center. Neither method was necessarily easier or faster, so just do whatever you prefer.) After everything is wired together exactly as you want it, you can give your bout a finished look by wrapping the stems with (more) ribbon and securing that ribbon with (more) hot glue.
And now we can cross that project off the list! Woohoo! Let's hope this recent craftiness is the beginning of a Project Floral Creations momentum streak - that way I'll be a little less stressed about our neverending to-do list, AND I'll have lots more to show you soon.
Are you using any floral-alternative elements for your wedding day? If so, are they DIY or something you're purchasing?
In case you couldn't tell (and I hope that's not the case), these are our boutonnieres. Over a year ago I saw an inspiration picture of grosgrain ribbon flower bouts and I thought the idea was fabulously fun, chic, and totally DIY-able. Mr. FW agreed and thus the plan was born. The steps were all pretty simple, but because I'm meticulous to a fault they each took an inordinately long time. In case you're interested, here's the step-by-step.
First you stitch down one side, either with the sewing machine or by hand. Knot the thread on one end and then pull the string on the other end (or one of the two strings, if you're using a sewing machine) until it gathers by an amount that will work for the size of the ribbon and the shape of the flower you're trying to make. Then you simply knot off the other end to hold the gather.
Hot glue one end of the gathered ribbon to the other, forming a (sometimes wonky-looking) circle. You're then going to hot glue a piece of felt to the back of each flower to hold the shape and to make it more sturdy.
Now for the flower centers. I know a lot of other people use buttons or beads, but we wanted a more substantial center that wasn't visibly button-like. I considered using buttons with shanks on the backs, and they would've been infinitely easier. But they were also more money than I wanted to spend and I knew tissue paper could give a similar look, so I went that route.
To do this, you start with a tissue paper ball roughly the size of the center you want. Bury the tip of your floral wire inside this ball and then wrap one or two layers of smooth tissue paper around both of them. Use floral tape to secure the tissue paper.
Make a hole in your felt center that's large enough to accommodate the tape-wrapped stem, then use a little hot glue to secure the ribbon flower onto the tissue paper center. To complete the look you can use some needle-nose pliers to bend the stem down. Then step back and admire your finished flower.

For Mr. FW's bout I incorporated a glass tile with a picture of his/our dog, Patches. I just needed to build up the center of the flower with some additional felt before I attached the tile with hot glue. My/our dog Eli has a matching tile that will probably be featured on my bouquet. This way we can have the dogs with us on our wedding day, even if they can't be physically present.
To put everything together, just bend the stems to place the flowers where you want them. A thin floral wire will secure them while you work. (In this picture you can see the two different kinds of backs I used - one as described and one where I just sandwiched the stem between two circles of felt. For that method I glued the tissue paper balls onto the center. Neither method was necessarily easier or faster, so just do whatever you prefer.) After everything is wired together exactly as you want it, you can give your bout a finished look by wrapping the stems with (more) ribbon and securing that ribbon with (more) hot glue.
And now we can cross that project off the list! Woohoo! Let's hope this recent craftiness is the beginning of a Project Floral Creations momentum streak - that way I'll be a little less stressed about our neverending to-do list, AND I'll have lots more to show you soon.
Are you using any floral-alternative elements for your wedding day? If so, are they DIY or something you're purchasing?
Subscribe to:
Posts (Atom)