
{and it looks SO much better when I don't have to remove our names. *sigh*}
Before I get to the tutorial, a few caveats. #1: I shamelessly stole the layout design from Mrs. Cupcake, so I want to give full credit where it's due. #2: I used a Gocco for this, and the materials for Gocco have gotten crazy expensive since they're no longer being manufactured. I'm sure there are other ways to do this such as the Yudu, but I have no experience with it. #3: I avoided this project for a while because I worried it wouldn't work and/or that it would take too long, but in actuality it took me about 2 hours to lay out the design, less than 30 minutes to burn the screens, and about 2 hours to print the napkins. That was it! Seriously my shortest project yet.
First step: Get the image ready for the Gocco. I used Photoshop Elements to lay out the design, and I sized each fact to be less than 3.5" by 2.75" so I could preserve precious Gocco resources by fitting two facts on each screen. Once printed, the design needs to be photocopied so that the image will be carbon-based (which is what the Gocco needs in order to burn a screen). I used the "artwork clean-up method" to "remove excess carbon" from your copy, and all that means is I put a piece of parchment paper on top of the copy and then I ironed it. I have no idea if this helps or not, but I wasn't taking any chances.
Second step: Burn the screens. I used a white 4x6 piece of paper on top of the Gocco pad to lay out the two facts I wanted to burn on the screen. Slide the blue filter into the Gocco first (because you're burning a photocopy), then the unburned screen. When you close the lid you can look through the window to ensure the layout looks the way you want it to. If everything looks good, insert your bulbs into the bulb housing and lower the housing onto the top of the Gocco. Recruit your partner to do the exciting work of pressing down firmly on the lid of the Gocco until you see a flash. Remove the bulb housing and be sure both bulbs flashed. (They'll be brown and hazy.) When you raise the lid, you'll see that the image is now stuck to the screen. Carefully peel it off and admire your burned screen.

Third Step: Prepare the screen for printing. When I looked closely at my screen, I saw a tiny area where the screen hadn't properly burned away. You'll be able to recognize this because part of your image will still be shiny rather than matte. In the image below, see how the leg of the M isn't burned? You can fix this by oh-so-carefully using a straight pin to scratch away the coating.

Raise the clear sheet and apply ink block to the screen. Ink block is supposed to keep one color from bleeding into another, but I also use it to save ink by keeping the ink from spreading out too far. So I just wrap the ink block around the image and through any unused space. Now choose your ink color. We spread some potential ink colors onto one of our blue cocktail napkins to get a sense for the contrast level between ink and napkin. Although I thought we'd love the grays, we ended up choosing the black and I was really happy with how it turned out.
Before you load your ink onto the screen, put your screen on a scrap piece of paper so the ink doesn't bleed through onto your table. Then spread the ink evenly over your image and lower the clear plastic cover. Insert your screen back into the Gocco with the plastic cover toward the top window of the machine. Put some scrap paper onto the Gocco pad and press down firmly on the front two corners of the lid to make a test print. Now is the time to make any needed changes - add more ink, spread out the ink, figure out what kind of pressure you need to use for your particular combination of ink consistency and paper absorbency. Then you're ready to move onto the real thing.

Fourth Step: Line everything up to make your print. My Gocco PG-10 has a registration plate and a moveable print pad, which I find extremely useful. The registration plate is basically just a piece of plastic that snaps into the machine. You stamp your image onto the plate, then put your paper (or napkin) under the plate and move the printing pad around until everything is centered/lined-up the way you want it to be. At that point, you want to make an L shape out of something sturdy (I used the cardboard sides of a tissue box) and stick it down to the adhesive plate along the corner of whatever you're printing. This will allow you to easily place your paper in the same spot for each print, and I promise it will save you a lot of time when you're printing hundreds of items back-to-back. Once your L guide is in place, you can remove the registration plate and begin printing.

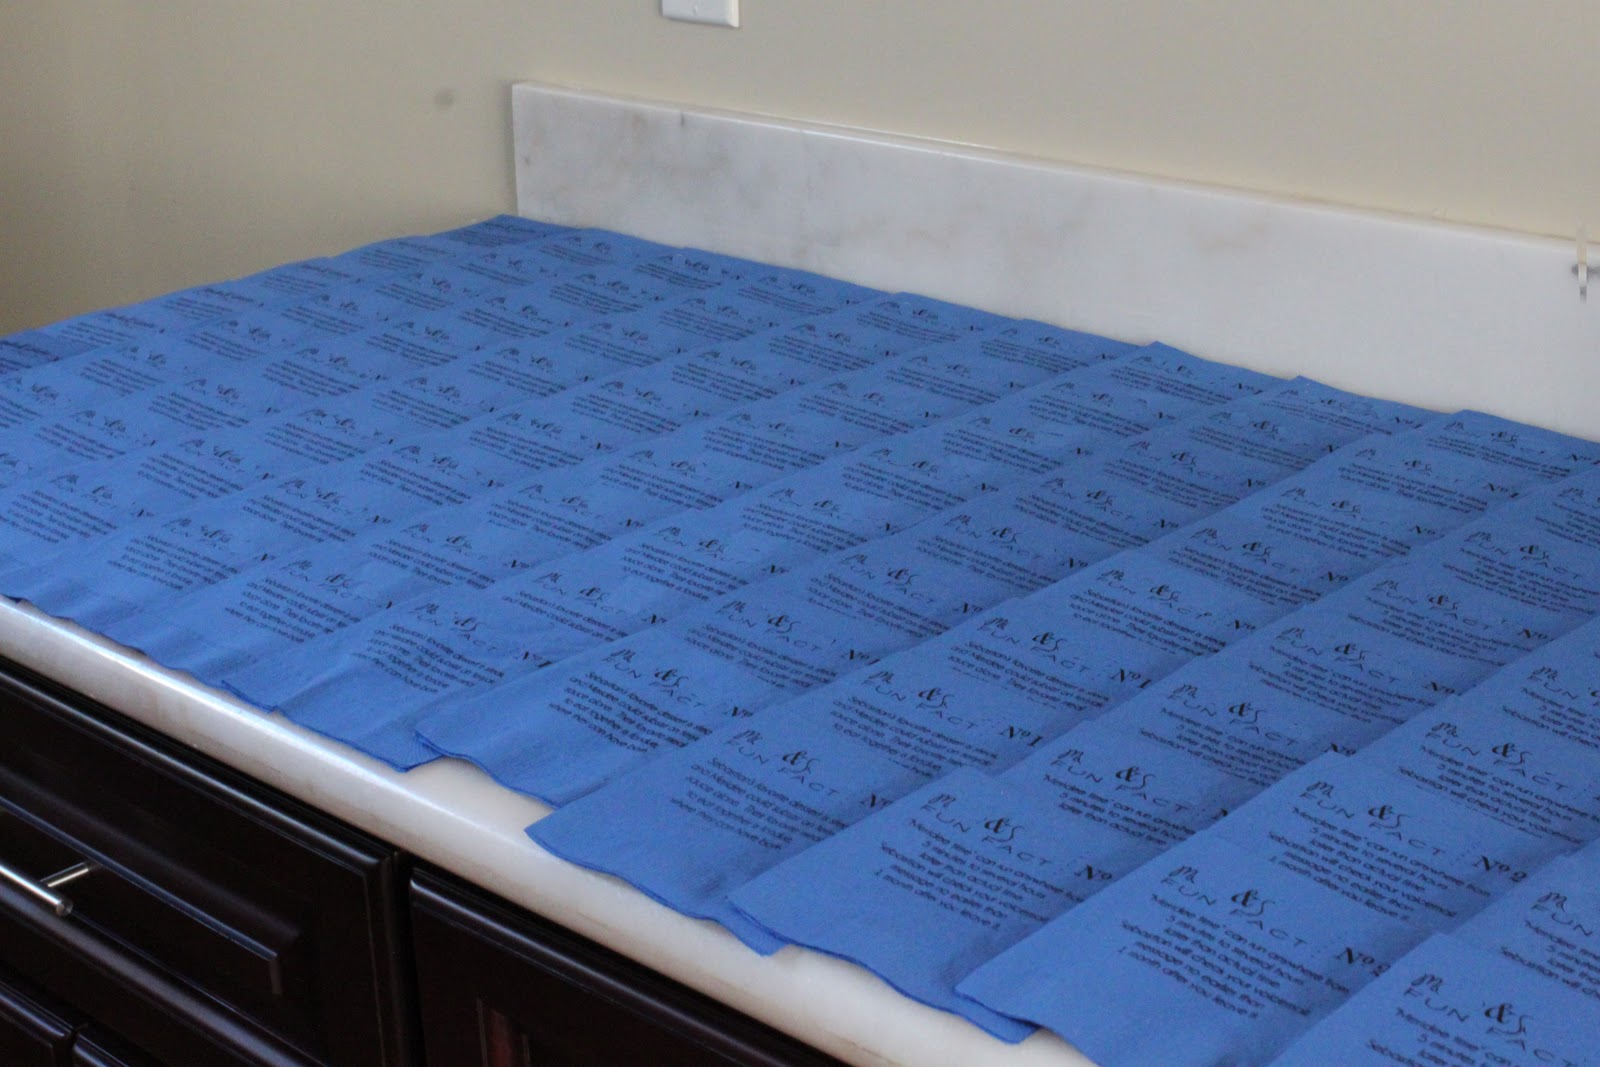
Fifth Step: Print your image. Happily begin printing away. If you're printing napkins, as I was, you'll need to reach under the lid and hold down the top layer of the napkin as you open the lid otherwise it will stick to the screen and smear your ink. Continually check the quality of your prints so you can tell when to re-ink the screen. Either you'll notice the ink getting much lighter or there will be places that don't print at all. Be sure to have a lot of space available for drying. The prints shouldn't be stacked for at least 24 hours to be sure they're completely dry. When you're ready to switch from one fact to another, take the screen out, lift up the clear plastic sheet, scrape off the excess ink and transfer it to the new area you'd like to print. You can then cover the old fact with sticky notes so they can be easily removed later if you want to reuse the screen.

Sixth Step: Clean and store your image. Apply Gocco screen cleaner and wipe with a (million) paper towel(s) until you can readily see light through all of the burned parts of the image. Then you can safely store the screen in case you need to print more of your design at some point in the future. For us, this is helpful in case we have more RSVP's than we expect.

Sorry for the long post, but I know that before striking out on my own I read a lot of Gocco tutorials and I preferred an overabundance of details rather than too little information. Feel free to let me know if you have any questions. I'm no Gocco expert by any means, but I'm happy to share what little knowledge I do have - because everyone should get a chance to be this giddy about cocktail napkins! Let's hope our guests love them even a tenth as much as we do.
So tell me, do you have a Gocco? What projects do you use it for? What questions do you have?
No comments:
Post a Comment
Note: Only a member of this blog may post a comment.